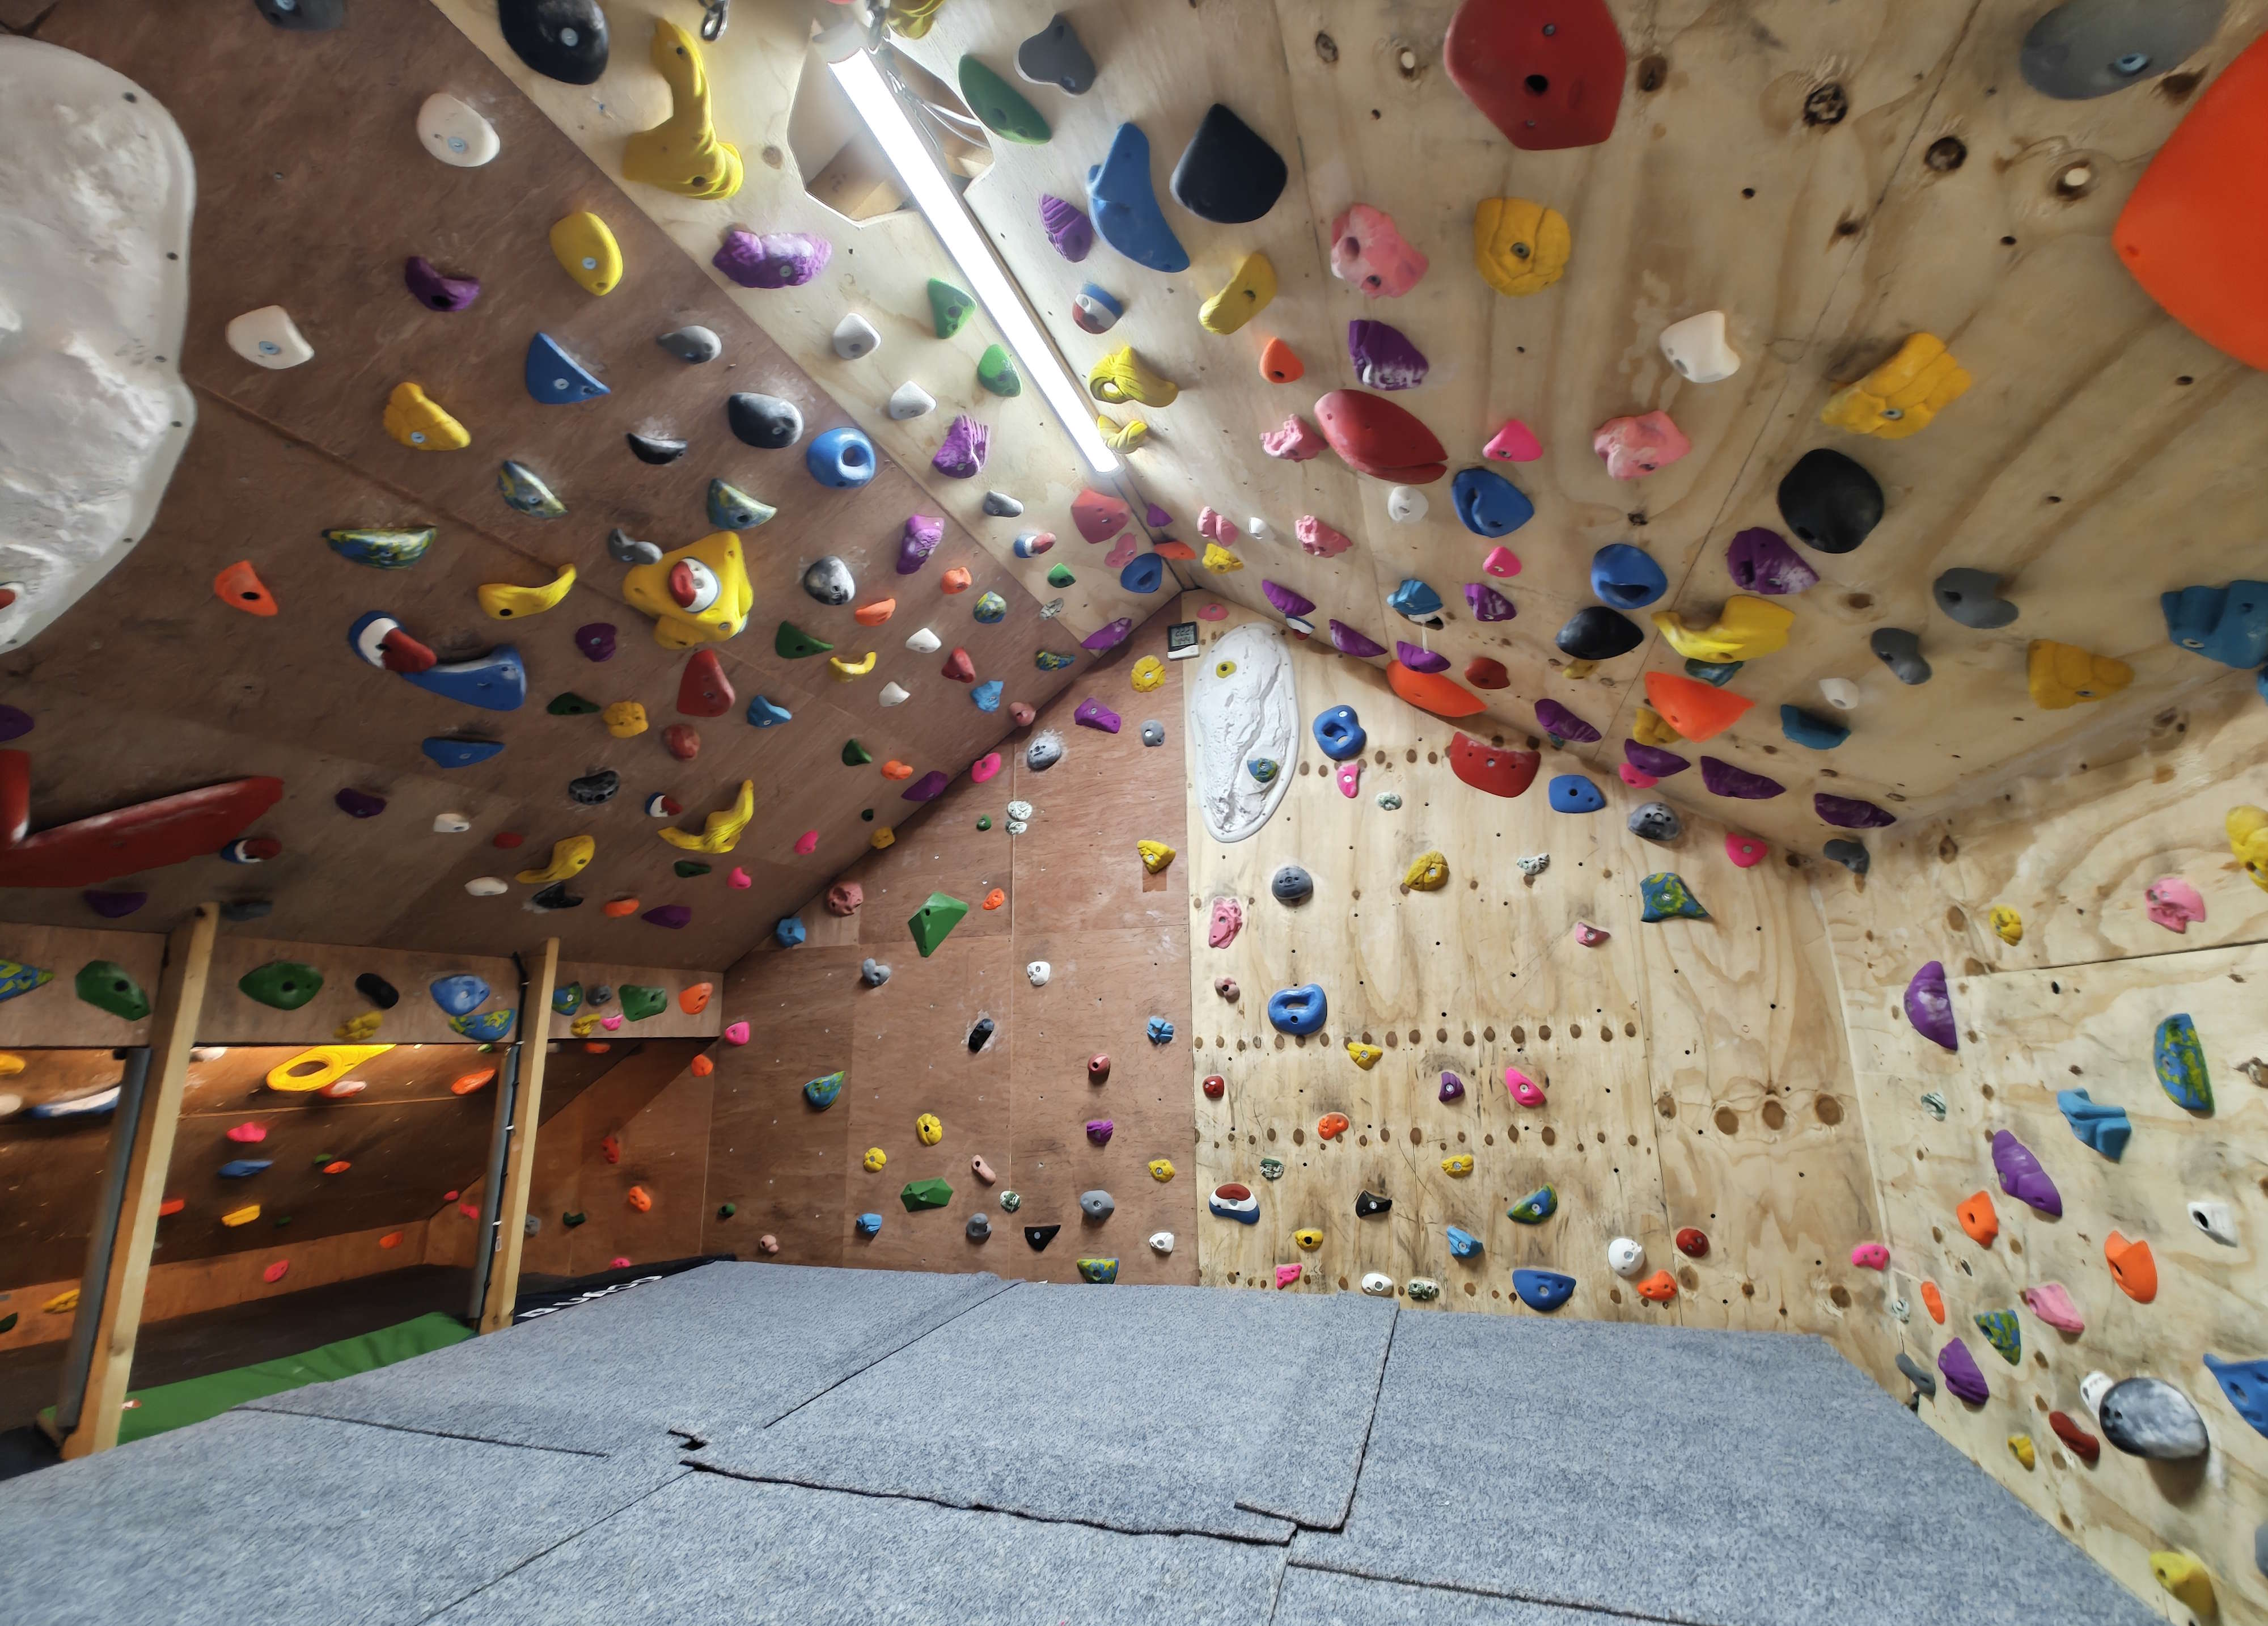
What I learned building my home rock climbing wall
A few people have asked my advice on building a home rock climbing wall after seeing mine, including where I recomend to buy holds from. Here are my thoughts and lessons from the process, including what I might do differently if I started again.
First up, is it worth it?
The short answer for me is yes, but only just. It depends a lot on what you want to achieve. A home wall is much more fun for me than a hang board, but falls well short of a proper climbing gym or crag. That said, the convenience and ability to train certain moves or techniques is helpful.
The key reasons
Ease of training: This is a key reason. I have a busy job so I don't have loads of time. With the nearest indoor wall around an hour's drive away, a good home training option is worthwhile for me, especially for winter when outdoor crags are too cold and wet to be fun.
Cost saving: Wood, climbing holds and matting are quite expensive. There are ways to save money (make holds, use old mattresses, follow existing structures etc) but any good set up is going to cost £1,000+, if not more. Most climbing gyms offer discounted annual membership fees so whilst it's possible to save money with a home gym, it will take years of use to pay off and of course anything you build for a reasonable price is tiny compared to a commercial gym, so I would advise caution if your main motivation is having a cheaper alternative to a commercial gym.
Train a weakness A big advantage of a home wall is the ability to set your own routes to work on your own weaknesses, like crack jamming, slopers or fine footwork for example. Crack climbing in gyms is particularly poorly represented. I also sometimes boulder at home with a trad rack and practice placing gear, a clear violation of health and safety in a normal gym but I'm happy to accept the risks and do it (I do have a much lower wall and thick matting).
How I built the wall
Pick the space If I started again I'd probably build something in the garden (because the loft is too steep & small), maybe using the outside wall of the house. That said, making clever use of the space you have available is worthwhile. Also making an outside wall in Ireland would require a lot of weatherproofing, maintenance, and it would still have a shorter lifespan.
Build the wall I didn't have much of a master plan. With a career in the software industry I'm used to building things in increments, testing as I go. Other websites have good advice on planning in advance. I also didn't have to do much structural “stud work” apart from the flat sides and boxing in the water tank.
I brought matting from core. It was expensive but was the right fit. I thought it was a waste of money because the wall is not high and I tend to land on my feet, but the one time I fell from the apex of the blue route and I landed head first on the mat (in a sealed loft) I was glad of a proper mat.


My 8 key learnings:
1. Don't make it too steep.
I followed the wooden rafters of the roof which was quick, easy and cheap for building the wall. But the wall is now extremely steep. This means warming up is hard and making routes typically requires bigger holds and/or more holds. If it was less steep I could use smaller holds and it would be more realistic training for climbing outside routes. The yellow warm up circuit cost more than £300. A route the same length and difficulty would cost a ¼ of the price on a less steep wall.
2. Following natural structures saves time and money.
Attaching wood battens to a solid brick or block wall and screwing ply to this is much cheaper than building your own load bearing structure. For overhangs you may be able to use roof rafters, but make sure they are strong enough. UK law (BS EN 1991) only requires roofs to hold 0.6 kN/m² (a static load of 60Kg per square meter). If you attach ply to multiple rafters the load is spread over more space. I have had zero issues 5 years on (and have solar panels on the other side) but the metal girders in my house gave me confidence it would be fine.
3. Screw in T nuts are better.
There are “hammer in” spiked T nuts and “screw in” plate T nuts. The Hammer in type are cheaper and quicker to install, but if you can't easily get access to the back of the wall, go with screw in T nuts. The hammer in ones do pop out or twist off, even if you are careful. If a bolt pushes the nut through or twists it off you end up having to remove the panel or cut the bolt.
4. Drill more holes than you think you will need.
5 years on and I've run out of T nut holes in the key parts of the wall so I have to use screw on holds and Lonestar inserts. My spacing was 20cm offset but I would recommend 15cm or even 10cm spacing. Offsetting was also more faff than it was worth. A grid would be fine. Having more bolt holes makes it much easier to adjust routes and the position of holds without drilling lots of screw holes in the wall. Rotating a hold a few degrees / half a cm, can change the grade of a route up or down. Screw holes become unusable quickly on 18mm ply.
5. Make it a nice space.
Making the wall a fun & nice place to be, will make you more likely to want to train there than a grimy dungeon. I didn't paint my wall (yet) and regret that now, because I don't want to strip the routes and re-do them just to paint it. Also the lighter coloured softwood ply was much cheaper and is degrading fast from smearing feet; I suspect paint would reduce this wear.
6. Consider temperature control and ventilation early on.
I've had to retrofit vents and fans into my loft. Having a ventilation set up to the outside, from the start, would have made more sense. In summer it can be too hot to climb and in winter warming up is hard.
7. Use thicker and more regular support beams
I used 18mm ply for the walls (which is quite standard), but did not keep the beams as close as I should, and also used some thinner beams than is ideal. Essentially using up spare wood I had. Now the wall flexes when doing more powerful moves. This is not a major problem, but a more solid wall would be more enjoyable. Using offcuts of spare wood for the beams saved money, but the wall is now “springy” in places.
8. Use star drive / torx screws.
Cross headed or Philips screws get damaged quite easily. Using a star headed screw and star drive bit is, in my view, worth the slightly higher cost.
Tool recommendations:
Cutting: A circular saw is highly recommended for cutting straight lines on ply sheets. It's much better for speed and straight edges Vs a jigsaw (although using a guide with Jigsaw is okay). If you can avoid cutting ply (by designing the wall based on full sheets) even better!
Drill: Using a good quality 13mm auger drill bit with a powerful drill will make drilling the holes easier.
Home climbing wall training routines
Circuits with clips
This is the best training routine I have ever found. I talk about it in the article 8 training routines to boost climbing performance. Essentially pre place 5 or 6 bits of gear evenly then do circuits for as long as possible clipping the gear as you go with a short 3m rope tied around your waist.
Twister
I built a basic voice recognition app that can call out colours and limbs (left arm to green etc) and I move to it and say "next" when done. I also built a version that requests I place trad gear periodically but haven't used that in a while.
Routes & Score Calculator
There are over a dozen routes in the loft and I have given each a grade and score. I then track the score of my sessions.
Where to buy Holds:
For a home wall the below list, are the only suppliers really worth considering for the UK, in my view. I tried others like Metolious (their screw ons are okay), HRT (very poor quality volumes), Bluestone (too expensive for what you get), Alien (good but out of business now) and a few others. The below list I'd all buy from again:
Eclipse:
- ✅ Great selection
- ✅ Great price
- ✅ Very well designed holds
- ✅ Good mix of pack sizes (even individual holds)
- ✅ Best options for crack routes
- ✅ Responsive to questions (delivery to Northern Ireland was possible)
Holdz:
- ✅ Great selection
- ✅ Decent price (although variable)
- ✅ Good mix of pack sizes
- ✅ Quick UK delivery
- 🛑 Website is clunky if you want specific colours
Tri-point:
https://tripoint-holds.com/en/
- ✅ Great selection
- ✅ Great price
- ✅ Very well designed holds
- ✅ Very well finished holds
- ✅ Good mix of pack sizes
- 🛑 Delivery post Brexit is expensive
Core:
- ✅ Great selection
- ✅ Very well designed holds
- ✅ Very well finished holds
- ✅ Good choice of colours
- 🛑 Only sell bigger packs
- 🛑 A bit expensive per hold